ShijingLiang
CESM2 Tutorial
- Start running a case in CESM2
- Case study: modifying sea surface temperature (SST) in a land-atmospheric coupled case
Step 1. Connect to Taiyi Supercomputer
Process 1. Download MobaXterm for Windows
Download link: https://mobaxterm.mobatek.net/download.html

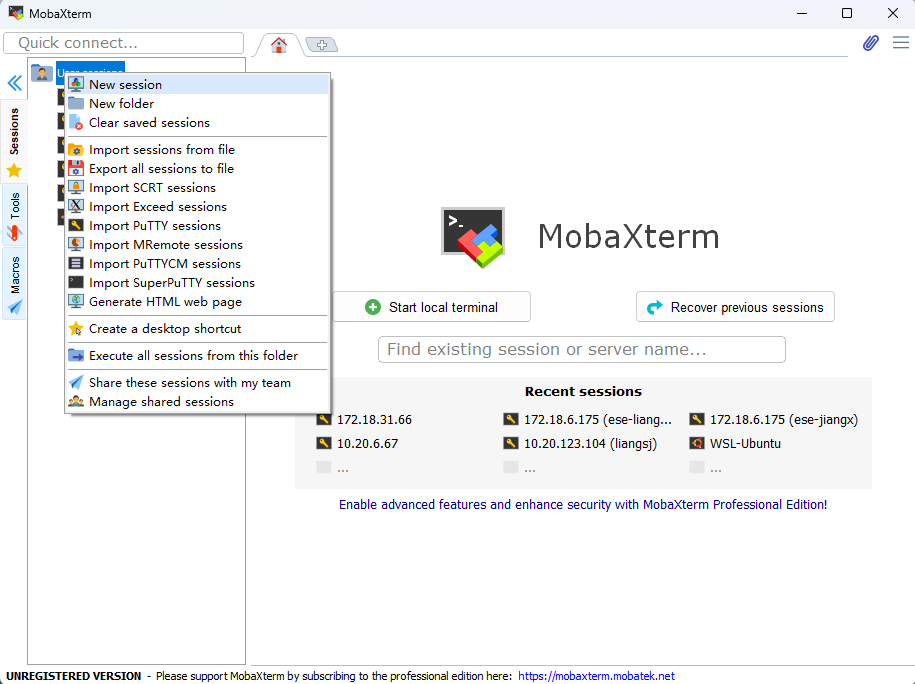
Process 2. Open MobaXterm and start a new session
“User sessions” (right click) -> “New session”
In Session settings:
- Click SSH
- Remote host: 172.18.6.175 (172.18.6.178)
- Specify username: ese-liangll
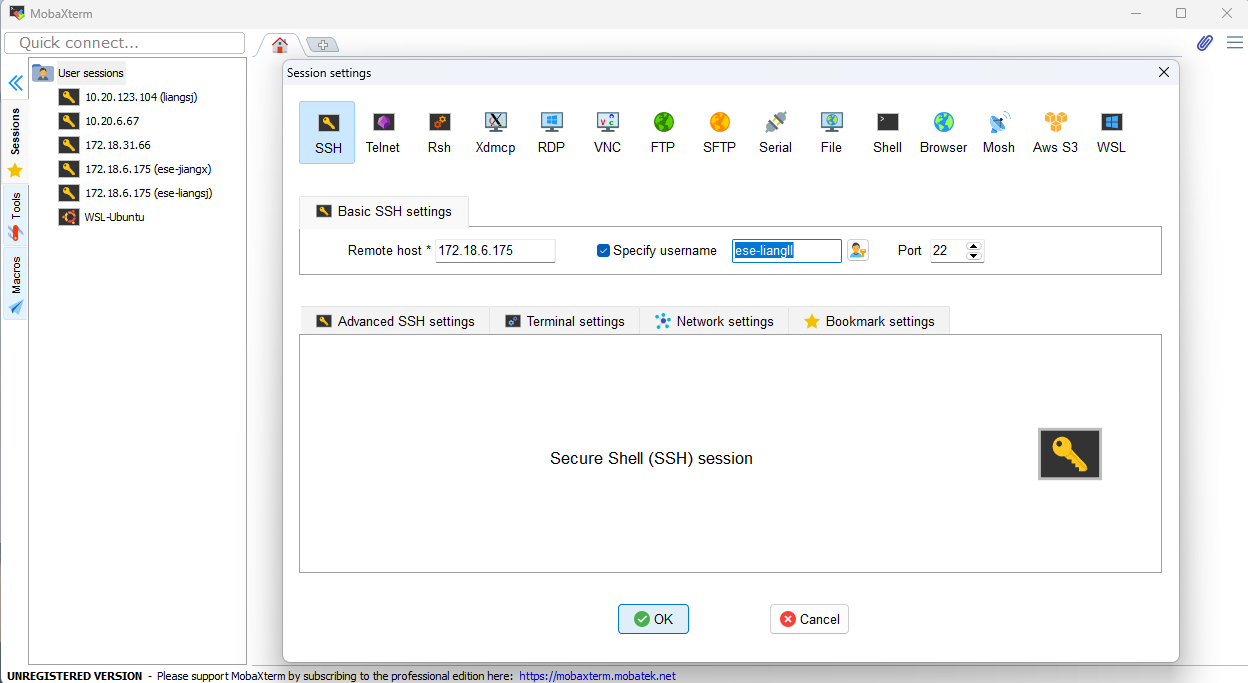
- Press OK
- Copy and Paste password (You won’t see the password on the screen)
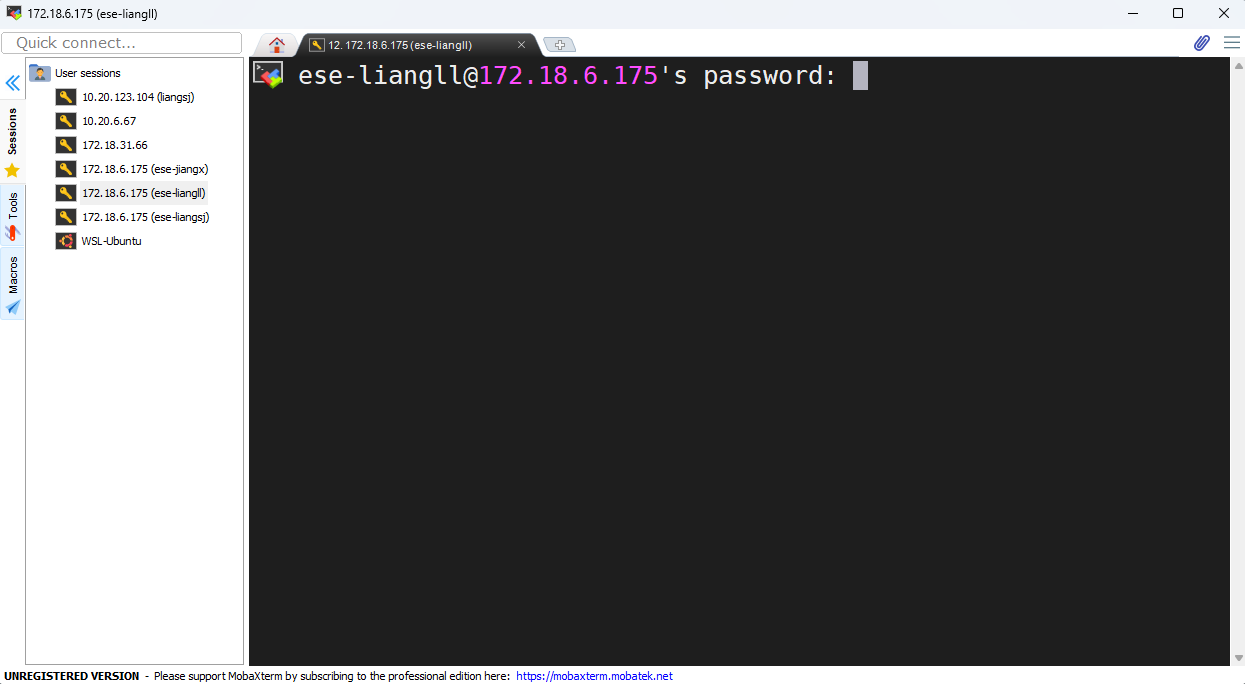
- Press either Yes/No
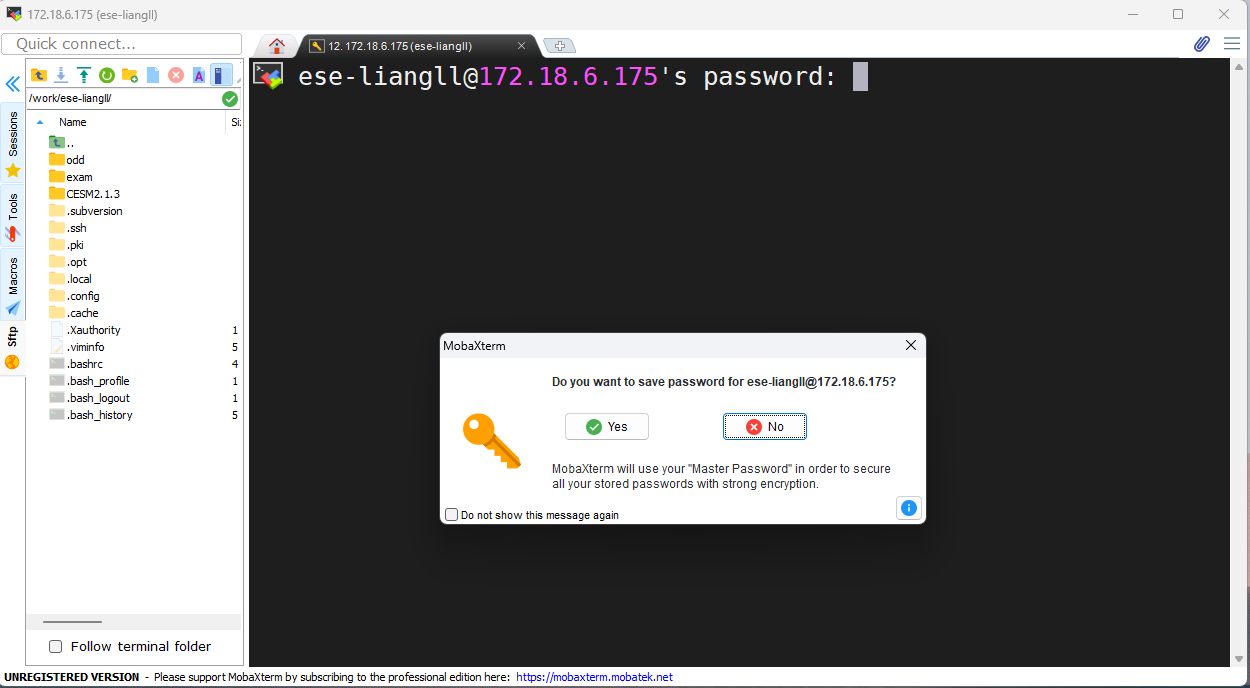
If you see it as below, congrats, you have successfully connect to Taiyi supercomputer!
For more information on Taiyi, please refer to hpc.sustech.edu.cn
LINK: https://hpc.sustech.edu.cn/process/user_guide.html
Step 2. Let’s run CESM2
Porcess 1. Creat a case
-
[ese-liangll@login02 ~]$ cd /work/ese-liangll/CESM2.1.3/my_cesm_sandbox/cime/scripts/
-
[ese-liangll@login02 scripts]$ ./create_newcase –case /data/ese-liangll/CESM2.1.3/cases/newtest_TA –compset FHIST_BGC –res f09_f09_mg17 –mach sustechliangll
Process 2. Case setup
- [ese-liangll@login02 scripts]$ cd /data/ese-liangll/CESM2.1.3/cases/newtest_TA/
Change run options: do monthly run for 12 months
- [ese-liangll@login02 newtest_TA]$ ./xmlchange STOP_OPTION=nmonths,STOP_N=12
Change computation requirement: total tasks = 240 cores
- [ese-liangll@login02 newtest_TA]$ ./xmlchange NTASKS=240
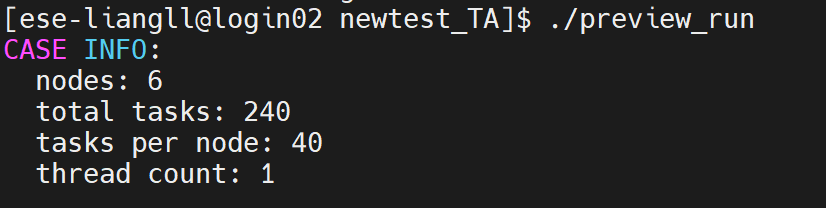
Check the running requirements
- [ese-liangll@login02 newtest_TA]$ ./preview_run
- [ese-liangll@login02 newtest_TA]$ ./case.setup
Process 3. Case build
- [ese-liangll@login02 newtest_TA]$ ./case.build

Process 4. Case run
Note: make sure to read taiyi user manual and attend training as a beginner.
Manual: https://hpc.sustech.edu.cn/ref/taiyi_User_Manual_v0.6.pdf
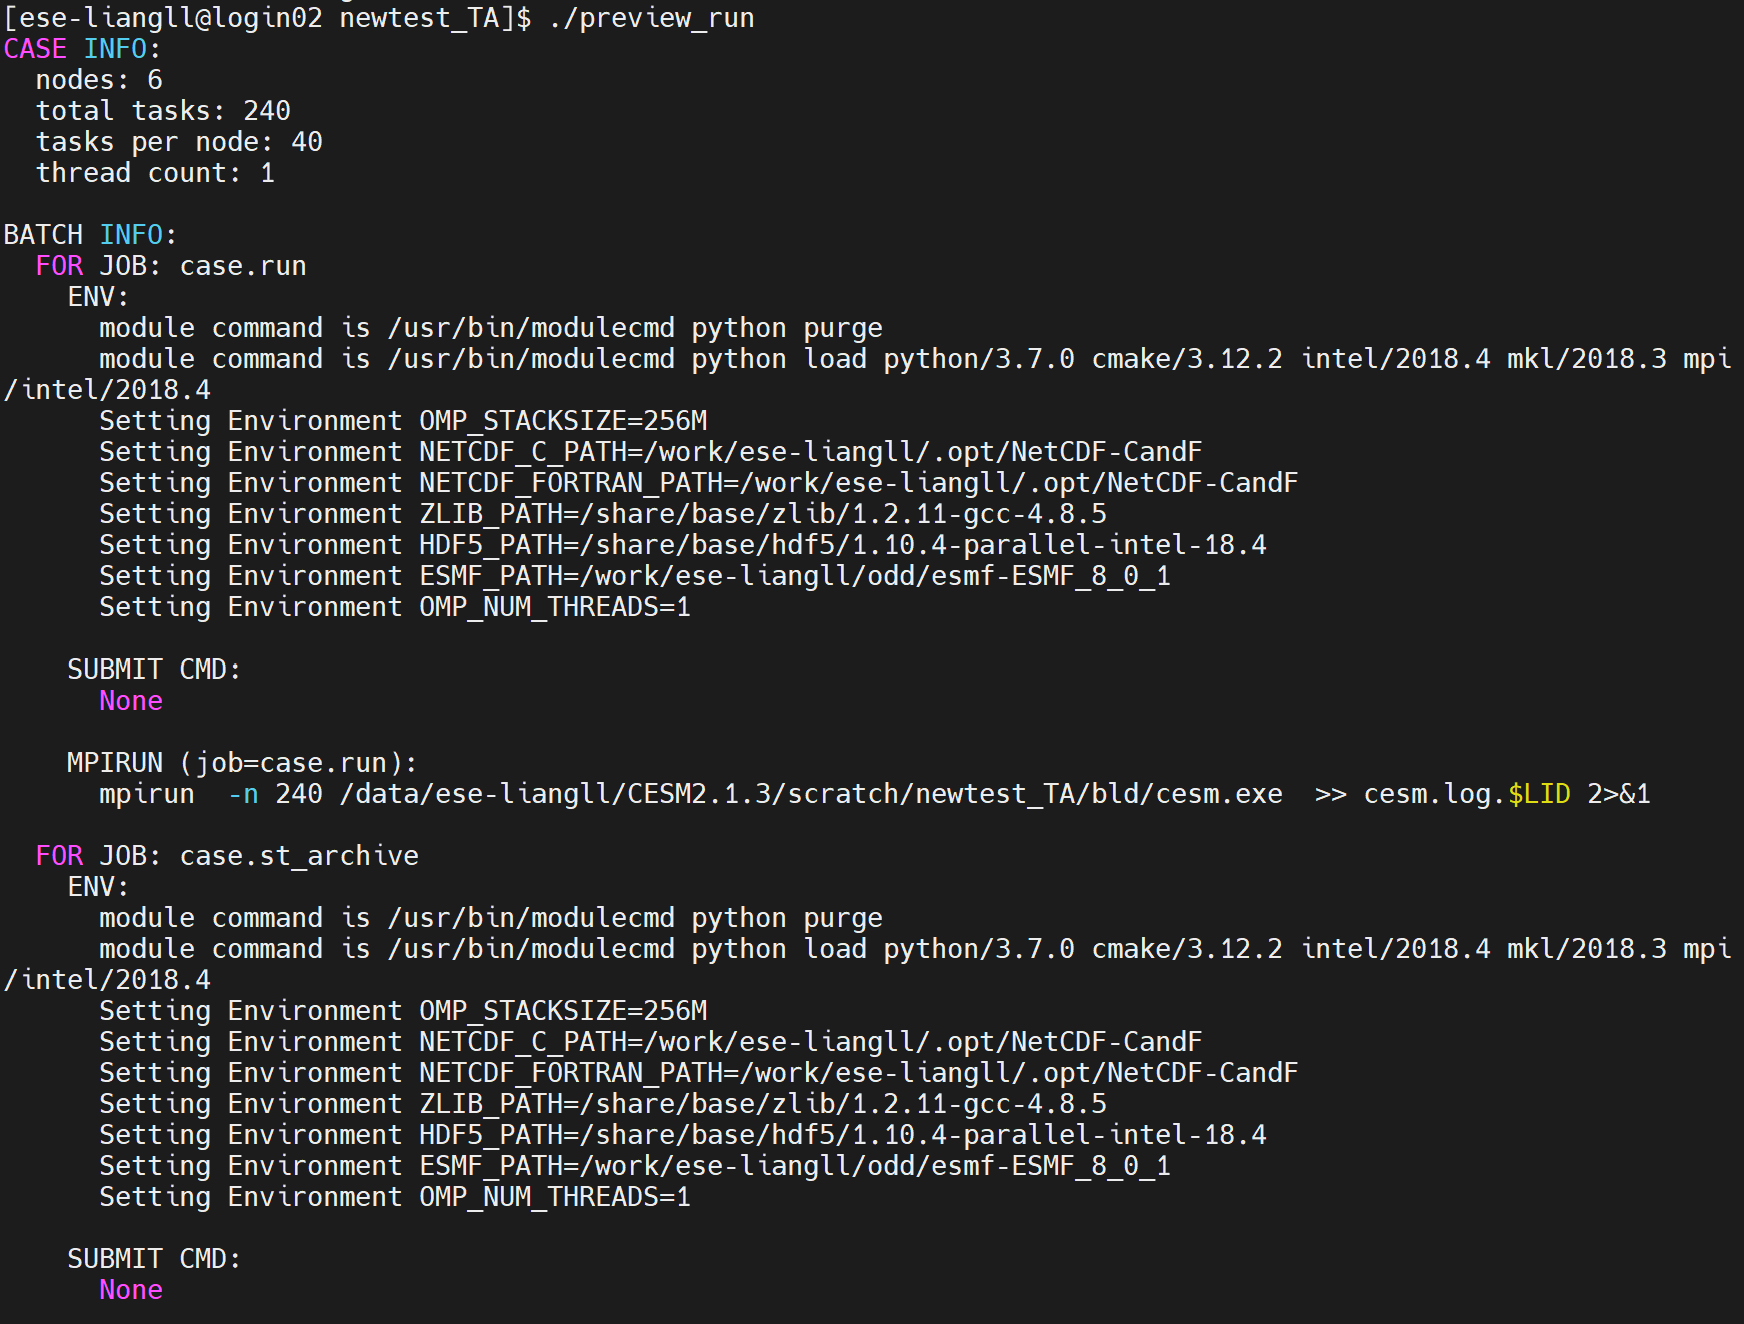
Do preview run to check the requirement to run the case.
- [ese-liangll@login02 newtest_TA]$ ./preview_run
- [ese-liangll@login02 newtest_TA]$ vi run_newtest_TA.sh
Type the following statements. Note: you may need to change the case name with your own.
bsub -J newtest_TA -q medium -n 240 -R “span[ptile=40]” -W 12:00 -o stdout_%J.out -e stderr_%J.err ./case.submit
-
[ese-liangll@login02 newtest_TA]$ chmod 740 run_newtest_TA.sh
-
[ese-liangll@login02 newtest_TA]$ ./run_newtest_TA.sh
Now you have submit the job and CESM2 should be running after waiting in the queue.
Note: Check the queue using bqueues
- [ese-liangll@login02 newtest_TA]$ bqueues
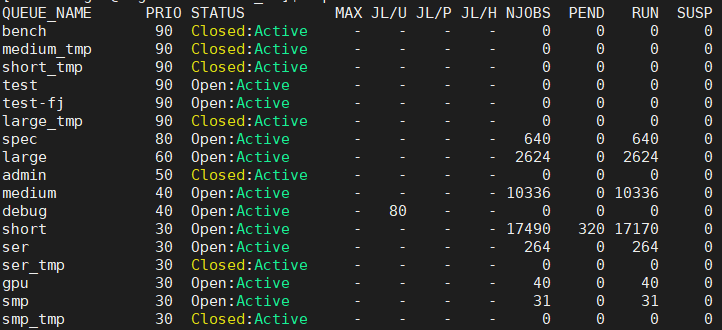
Note: Check the queue using bqueues
- [ese-liangll@login02 newtest_TA]$ bjobs

Additional information
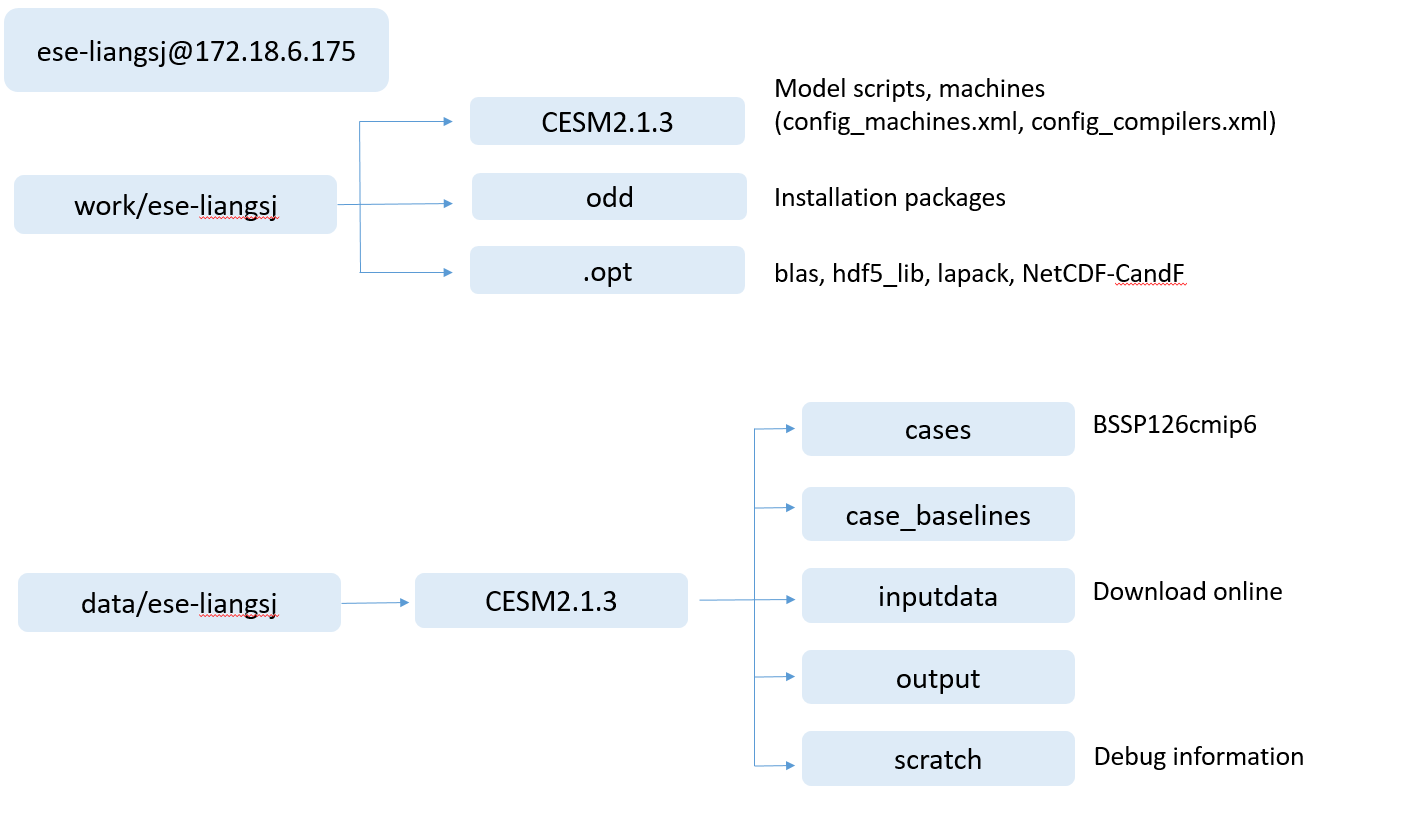
CESM model structure on Taiyi
Additional information on CESM2
- Model Official Website: https://www.cesm.ucar.edu/models/cesm2
- Quick Start: https://escomp.github.io/CESM/versions/cesm2.1/html/
- Component set: https://www2.cesm.ucar.edu/models/cesm2/config/2.1.3/compsets.html
- Debug platform DiscussCESM: https://bb.cgd.ucar.edu/cesm/
Model infrastructure and technical notes
- Land component CLM5.0: https://escomp.github.io/ctsm-docs/versions/release-clm5.0/html/tech_note/Introduction/CLM50_Tech_Note_Introduction.html
- Atmosphere component CAM6.0: https://ncar.github.io/CAM/doc/build/html/index.html
Contact info.: liangsj2021@mail.sustech.edu.cn